DIY truck electrical system maintenance: Driver’s Education
Ask any technician and they will probably have a story or nine about do-it-yourself repairs gone wrong. Some are amusing, like the guy who walks into the shop with a carboard box full of parts that he can’t remember how to reassemble. Some are more dramatic, like the guy who tries to install an inverter and burns his truck down to the frame rails.
Some repairs are within the scope of the average driveway mechanic, but electrical repairs on today’s trucks, while seemingly straightforward, can be risky. Changing out a marker light or a headlight is no problem, usually, if you have mastered the use of a Phillips screwdriver. Cleaning and securing battery terminal posts and various electrical connections can be a bit more challenging, but doable in many cases.
Adding chicken lights, aftermarket LED headlights, or installing an inverter? These DIY jobs can result in far more trouble than they are worth, if you don’t know exactly what you’re doing.
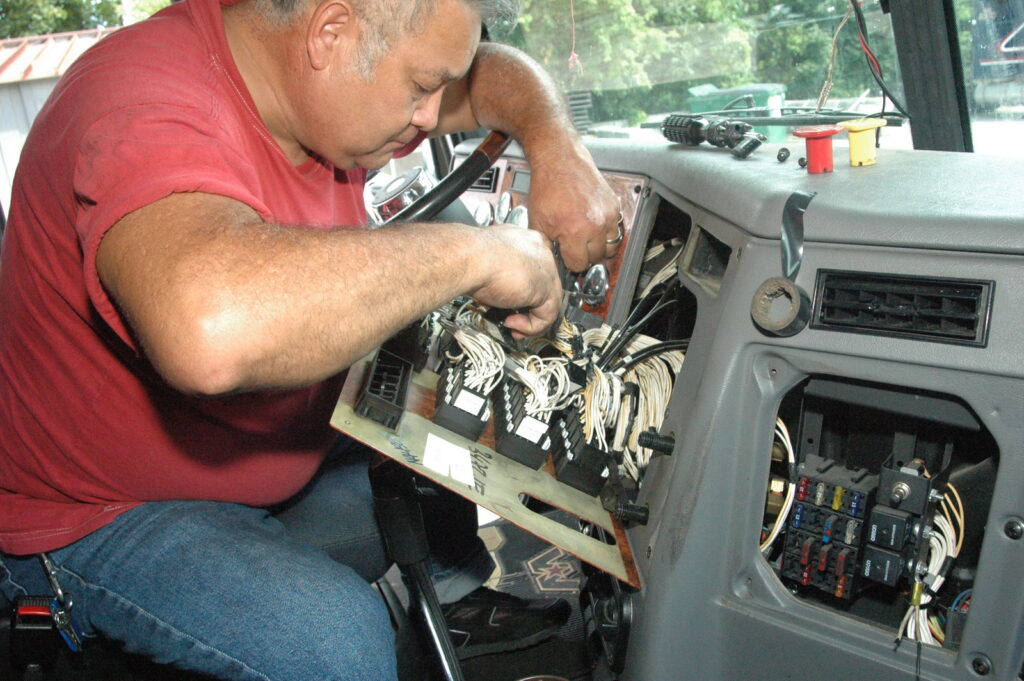
Even seemingly simple repairs like changing a corroded lamp wire or socket can lead to additional problems in the future. The thing with electrical repairs is, they look easy, but if you don’t understand some of the fundamentals of electricity and automotive wiring, you’re asking for trouble. The electrical infrastructure in trucks has changed significantly over the years.
No longer can you simply splice into any handy hot wire if you hope to power a new set of chicken lights or add a couple of switches or gauges to the dashboard. Most everything runs through an electronic control module (ECM) now, so adding a load to a circuit can change the current draw or voltage or resistance of the circuit, sometimes with annoying or expensive consequences (more on this below).
What parts do you carry?
While some fleets might appreciate drivers with a little initiative and a willingness to pitch in and help with minor repairs, many fleets would rather drivers didn’t touch anything more than the steering wheel. Minor stuff, like changing a burned-out light might be allowed, even encouraged, but don’t make that assumption without first asking permission.
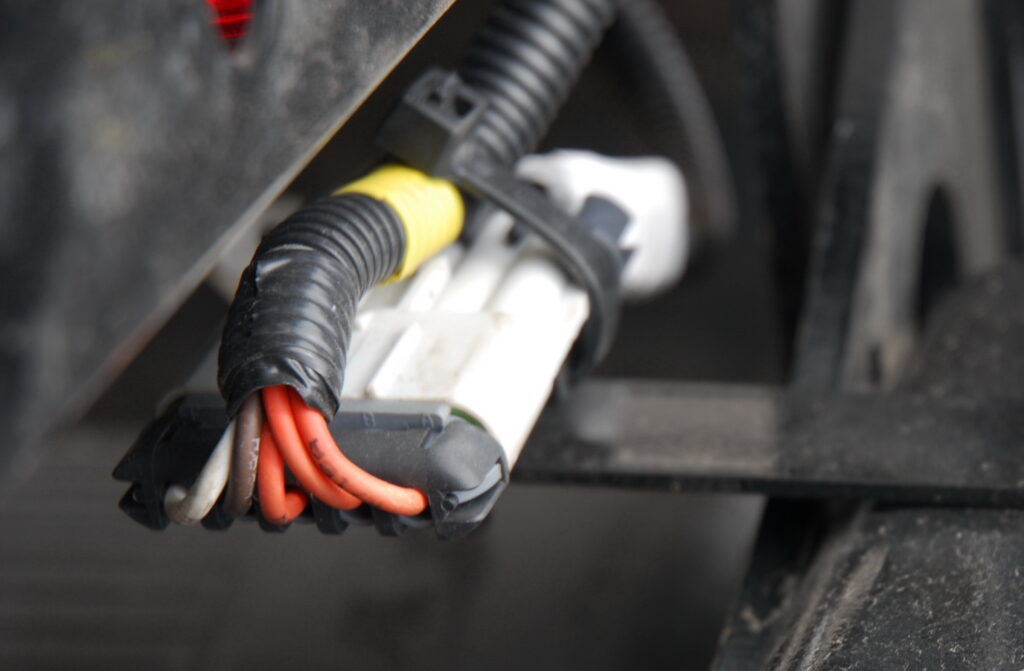
Fleets may have specific lighting requirements or systems that include specialized connectors that an uninformed driver might simply snip off with a pair of wire cutters if a suitable replacement lamp could not be found at a truck stop parts shop. Those specialized connectors could be designed to prevent corrosion. Splicing on a new wire will open the wire harness and allow moisture to enter, thus negating the purpose of the specialized — and expensive — connector.
Check with your boss on what you’re allowed to do with respect to minor repairs. The fleet might even issue a few spare turn signal, brake, or marker lamps. With incandescent lights, replacement bulbs are cheap and plentiful, so intrepid drivers should always carry a few spares. They are much cheaper than the cost of a ticket.
LEDs, however, are more expensive, and it’s harder for the fleet to justify buying a few dozen or a few hundred spares to equip drivers with spare lights. The same can be said for LED or xenon projector-bulb head lamps. They are very expensive, and no fleet would equip their tractors with spares. If you’re lucky enough to still have plug-in halogen headlamps, try to get hold of a spare and figure out how to change it. Some trucks don’t require any tools at all.
Frankly, LEDs hardly ever simply burn out, so if something goes wrong with an LED marker lamp, brake light, or headlight, the problem probably lies elsewhere — so a spare wouldn’t help in any case.
That said, U.S. DOT requires trucks to have an assortment of spare fuses as needed to keep “required” parts and accessories running. Some trucks still use fuses, though most are now equipped with circuit breakers. Check with your boss to see if there are any fuses you need to be carrying, and if you are permitted to change them.
Wiring repairs
Lighting problems account for five of the top 10 violations found by Department of Transportation (DOT) inspectors at roadside, but repairing lighting issues is not always straightforward. Obviously trailer clearance lamps can’t be conveniently repaired by drivers. Some of the violations closer to ground level could be simply burned-out incandescent bulbs, which are fairly easy to replace if you have a spare on board.
First you must identify where the problem lies. And believe me, it isn’t always obvious. The problem could be as simple as a connector that has come apart, or as messy as a corroded stretch of wire that could be anywhere in the circuit between the source and the load.
With trailers, the two reasonable options for drivers wishing to avoid lighting violations would be to inspect the failed light for a physical problem like a burned-out light bulb or disconnected or corroded connector, or to check the plug at the front of the trailer. It there are no lights on the trailer, or they go on and off intermittently, the trailer connector could be the problem. If — in the case of a pair of taillights — the adjacent light is working, you can be sure there’s power there. The problem is probably with the non-working lamp or its connector. Try changing the lamp if you have a spare. If that doesn’t work, write up the problem and notify operations; let the pros take it from there.
In most cases, such repairs should be handled by trained technicians. It’s not that drivers can’t splice wires, but it has to be done right to prevent future problems.
No user-serviceable parts inside
There are many layers to electrical systems in today’s trucks, and they are vastly more complex that trucks of 20 years ago. The wiring may not look that different, and this can lead to some overconfidence when trying to solve a problem. The network of onboard sensors is tied into one of several microprocessors that all depend on very specific voltages and current to operate properly.
For example, you might see a fault code from a sensor that suggests a failure of the systems it’s supposed to be sensing. The sensor and its component might actually be fine, but if the sensor is not getting the voltage it expects to see – because of added resistance in the wire, caused by corrosion (that green powdery stuff you see on old wires) — it would throw a fault code that could send you on a wild goose chase.
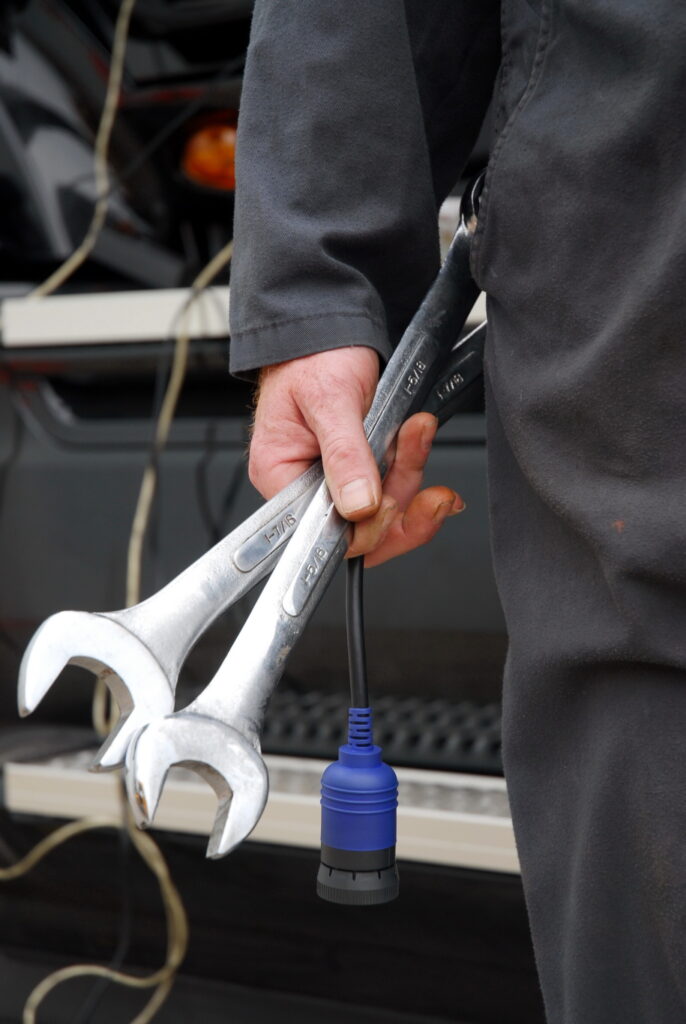
Truck makers have established troubleshooting trees for technicians to follow when diagnosing problems that involve connecting electronic tools to the truck and then running through a series of checks to isolate and identify the problem. Each step is supposed to verify that one thing is working before moving on to the next. After a series of go/no-go checks, the technician is usually able to isolate the problem and make the repair.
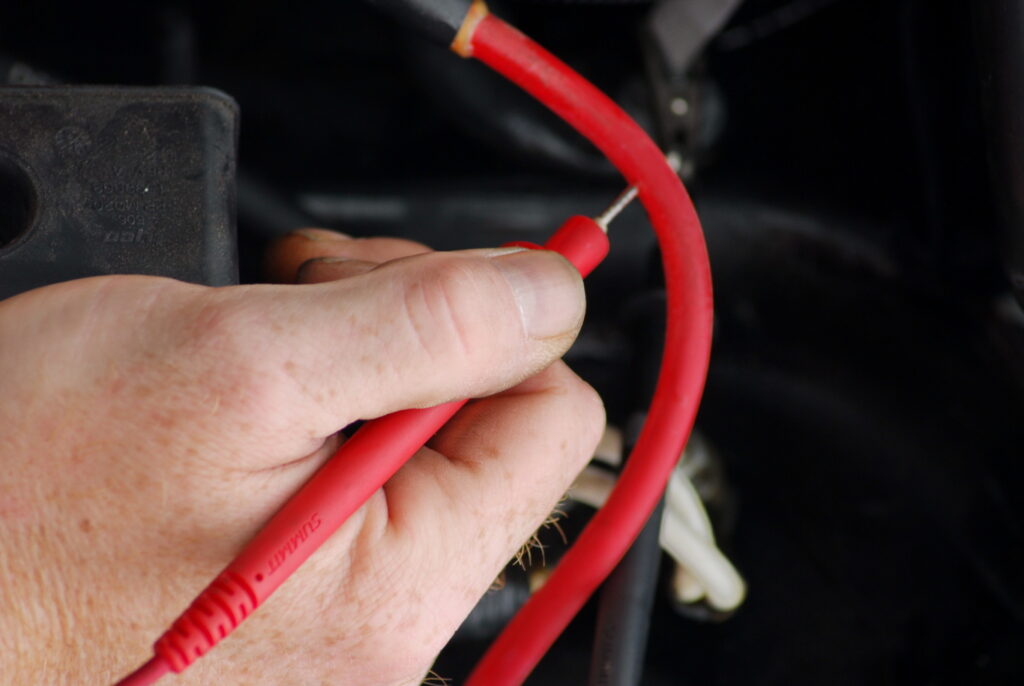
The one thing you never want to do is stick a pointy circuit probe or a test light into a wire to see if it’s working. Not only will this open the wire up to moisture ingress, the probe itself could cause additional faults with the system if it affects the voltage a sensor expects to see.
Many of the wires onboard trucks today not only carry voltage to various loads like lights and motors, they may also transport digital signals from the ECM to a component and back again. This is called multiplexing or PLC (power line carrier). Slight changes in voltage or resistance due to corrosion can upset the proper function of the component and cause it to throw a fault code. Poking the wire with a probe can have the same effect.
Should an inexperienced driveway mechanic inadvertently splice into such a wire and use it to power, say, a new under-cab light bar, you can really upset the inner workings of some electronic systems (more on this later). If you have to make repairs to what might be sensitive wiring, always use the same length and gauge of wire as the original, so the resistance values don’t change.
Owner-operators can buy off-the-shelf diagnostic tools, but they are expensive and the learning curves are steep. Still, such tools in skilled hands can help with the cost of electrical diagnostics. However, unless you know what you’re doing, this sort of DIY work is not recommended.
Routine electrical maintenance
You needn’t be a certified technician to perform routine maintenance, but it’s useful to be aware of the limitations of your skills and your tools.
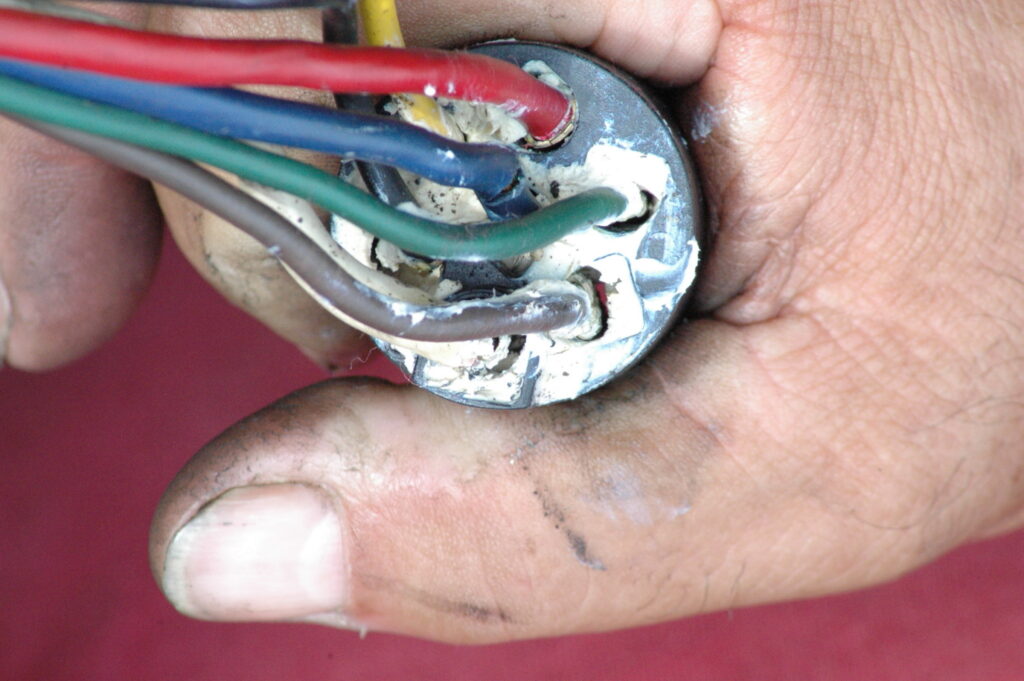
Among the more common causes of electrical (not electronic) trouble are loose or corroded connectors and chafed wiring, both of which can lead to failed circuits and short circuits.
On casual inspections, look closely at connectors that are exposed to water and road spray, or dangling connectors that can be moved around in the wind. That movement can crack the insulation on older wires, and possibly chaffing inside the wiring harness. Chaffing scrapes off the insulation, eventually exposing the copper conductor inside.
Leave well enough alone, but watch for white or green residue around the joint on vulnerable connectors. Don’t pry open the connector to look inside — that just makes it easier for moisture to get in. Likewise, don’t pry open the harness loom just to look inside. Disturbing it may just make matters worse. But do look for signs of corrosion — powdery white or green residue — inside the harness.
Watch for unsupported lengths of cable dangling in mid-air. This can stress the connector and the contacts inside. You can wrap such cable in a short length of rubber hose and wrap it with a cable tie to a supporting structure nearby, but don’t pull the cable taut as this will stress the connector.
Look closely at bundles of cable or the harness itself at points where it has been wrapped and tied to a supporting component such as a crossmember. Chafing can occur if the protective outer covering of the harness has worn away at those locations.
Don’t pick through the harness or bundle while inspecting it, but watch for signs of insulation damage or corrosion.
Up to this point, you’re advised not to break existing connections. Some things are better left alone if they appear to be working. Moving on to the batteries and the charging side, it’s a good idea to disconnect the cables from the terminal posts and clean them periodically.
Always disconnect the batteries before doing any work on them or on the downstream connections at the starter or alternator. Wear gloves and eye protection because the residue that builds up on battery posts is abrasive and corrosive.
Clean the battery posts and the inside of the connector with emery cloth or a fine-grained sandpaper. If you can reach them, do the same on the connections to the starter motor. Once you have removed all the residue, firmly tighten the connectors (connect the battery posts last), and apply some dielectric grease to the connections to prevent corrosion and to help maintain a better electrical connection.
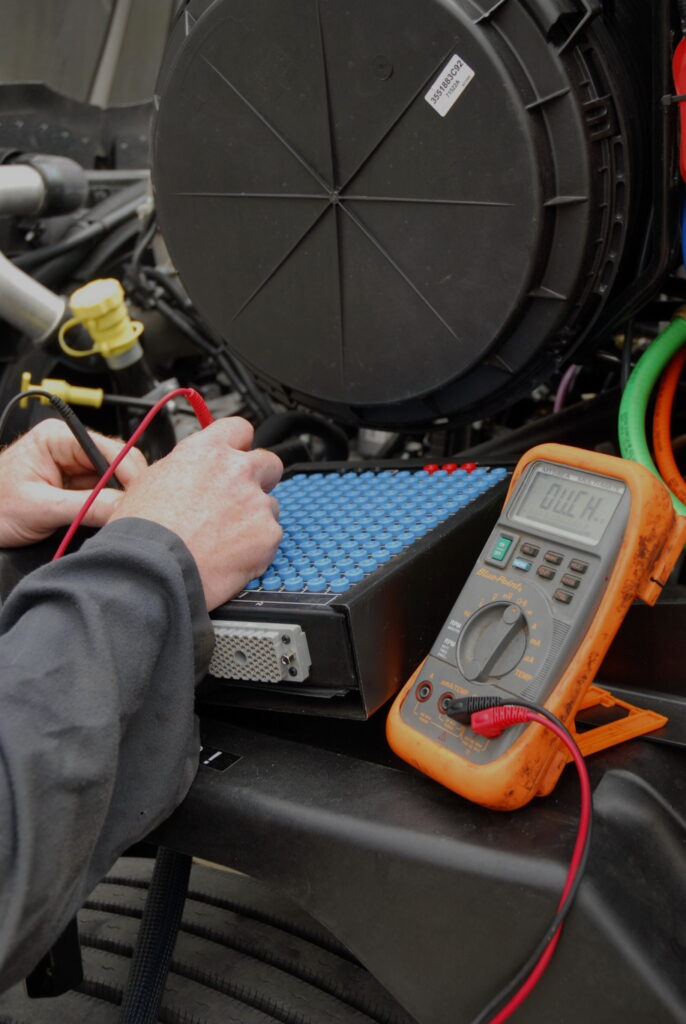
There’s not much you can do to test your batteries without equipment like carbon-pile load testers or digital load testers. These are specialized bits of equipment usually found in shops, not the average truck owner’s garage. If you suspect you may have a weak battery (dim lights, slow cranking), have them load tested before you get all excited about cleaning them.
Check the battery cable for chafing, too, especially those running out of the battery box. If necessary, take steps to protect the cable that are close to exposed metal edges, like the exterior of the battery box.

Parasitic battery loads
There are all sorts of electronics onboard now that never turn off and can eventually drain a set of batteries. There are other bits that may remain on even though you thought they were turned off, and sometimes stuff doesn’t turn off properly. If your batteries are good, you might be able to hold out for several days to a week, but if the batteries are on their last legs, you may be out of juice the next day.
If you know how to wield a multimeter, you might be able to track down the problem, but it’s probably best left experts.
One remedy might be a battery low-voltage disconnect switch or a manual disconnect switch that’s fairly straightforward to install.
Installing an inverter
If you are currently using one of those inexpensive off-the-shelf inverters such as those you might find at popular trucker stores and find that the breaker keeps disconnecting, the solution is not using higher-rated fuses, it’s lightening the load on the inverter. Getting a larger-capacity inverter is not a solution, either. You can draw only so much current through a 12-volt port.
Small plug-in inverters have limited application. Trying to overload them or bypassing the built-in protection or onboard circuit protection can end badly. These inverters are generally fairly inexpensive, which is what makes them popular. But they are inexpensive because they are low-wattage and may not have the internal protections needed to prevent fires — and they may not have been tested and approved by the likes of Underwriters Laboratories (look for the UL 458 mark on the product) or CSA in Canada.
Should you plan to buy a larger inverter and hardwire it into the truck, follow the instructions meticulously. Make sure proper polarity is observed between the battery and inverter DC input, and keep the connections tight. Loose connections can overheat due to high resistance and even start a fire if they are not properly circuit-protected.
Cable length and routing is also a concern. Longer cable runs increase the voltage drop and add resistance to the circuit. Try to place the inverter as close to the batteries as is safe and practical, all things considered, and check technical data on cable length, gauge, and voltage drop to insure the losses are minimal.
While the batteries and the inverter may not be that far apart physically, by the time you route the cabling through the floor, around the various corners, and keep it protected from heat and corrosion, the cable run can get pretty long. That’s where the correct cable sizing becomes important.
More than one improperly installed inverter has resulted in a fire, sometimes with a complete loss of the truck. If you have any doubts about how to properly install an inverter, leave it to a professional.

LED headlights
Installing a set of aftermarket LED headlights could be setting yourself up for problems down the road. When the truck was built, the system was designed and certified with certain components in mind. Changing things like the headlights can upset the current draw on the system, which isn’t necessarily the end of the world if the wires are up to it, but you could be setting up all kinds of fault codes, too.
Inexpensive aftermarket products may or may not be suitable for use in a truck, and since they tend to run pretty hot — look at the big cooling fins on some of them — you could damage the headlight housing and get into an expensive repair. Choose your product carefully and consult with the dealer to see if they are appropriate.
Arc welding on the truck
If you plan to do any electric welding (arc welding) on the truck while it’s home in the driveway, be sure to disconnect the battery cables first. The kind of voltage those welders produce can create some serious voltage spikes. If the batteries are disconnected, the rest of the truck is fairly well protected. And keep your ground clamp as close to the work as possible to minimize how much of the chassis you’re welding through. That gets you a better weld, too.
Further reading
TMC RP 186 Wire and Cable Repair Guidelines We all know how much truck drivers, especially men, dislike reading instructions or asking for advice, so when nobody is watching, read Recommended Practice 186-Wire and Cable Repair Guidelines, from the American Trucking Associations’ Technology and Maintenance Council. It offers a very thorough explanation with great illustrations of the proper ways to repair wire and cable. The proper techniques take a bit longer, but if you haven’t got time to fix things properly once, where will you find the time to fix it five more times?
- Driver’s Education is an ongoing series of articles that focuses on things drivers need to know, but may not have learned during entry-level driver training.
Have your say
This is a moderated forum. Comments will no longer be published unless they are accompanied by a first and last name and a verifiable email address. (Today's Trucking will not publish or share the email address.) Profane language and content deemed to be libelous, racist, or threatening in nature will not be published under any circumstances.
Also, if your headlight lenses are all cloudy, clean them or replace them. Don’t head to the store and buy one of those big LED off road lights and blind us all!